Windows 10 media creation tool for version 20h2
Содержание:
- Новая материнская плата? Потеря Windows
- Upgrade to Windows 11 using Media Creation Tool
- Download Windows 11 Media Creation Tool
- Conclusion
- How to use Media Creation Tool
- How to download the Windows 10 Media Creation Tool
- Способы обновления Windows 10
- Use Windows Media Creation Tool to Upgrade Your PC
- What You Will Require?
- How To Use Windows 11 Media Creation Tool
- Объяснение: средство создания мультимедиа для Windows 10 (2021 г.)
- Create Installation Media For Another PC Option
- Результат
- Что вы должны знать, прежде чем идти вперед
- Выводы статьи
Новая материнская плата? Потеря Windows
При активации Microsoft сразу связывает лицензию ОС с уникальным кодом различных компонентов вашего ПК, называемым также Product ID. Благодаря этому становятся возможным обновления и возможные переустановки Windows 10 на этом компьютере в будущем. Однако существует риск отказа системы из-за слишком большого количества замененных системных компонентов.
После покупки нового жесткого диска или же обновления BIOS «десятку» придется активировать заново — это мы поняли во время тестирования. Однако все иначе в случае с материнской картой: после замены этого критического компонента Windows 10 больше не может быть активирована на этом компьютере. Необходимо покупать лицензию или же сначала установить старую версию, а уже с нее провести обновление до «десятки».
Этот метод, впрочем, работает только с Retail-вариантами с ключом в комплекте. Если же у вас OEM-версия, а материнская плата от того же производителя, что и ПК и была заменена в рамках ремонта, необходимо к нему же и обратиться. Производитель несет ответственность за восстановление прежнего состояния вашего компьютера.
Upgrade to Windows 11 using Media Creation Tool
Chandan Pandit
September 3, 2021 11:20 PM
Windows
The beta build of Windows 11 has started rolling out to Windows Insider users. Windows 11 brings many improvements over the normal Windows 10 such as a new redesigned home interface, a new Microsoft store with native support for Android apps, a re-touched taskbar and icons, and more. The stable rollout of Windows 11 might happen in late 2021 or early 2022. Many users are willing to try Windows 11 on their PC, but they are not officially eligible for that. Well, for those, Windows 11 Media Creation is a helpful tool. The Media Creation tool can upgrade its system to Windows 11 seamlessly.
The Windows Media Creation tool allows users to sideload Windows 11. It’s more like flagship a custom ROM in Android with the help of TWRP recovery. For some sets of people, the creation tool is easy to use and operable, but it might come out as a bit complicated for beginners. So, in this post, we’ll de deciding on How to upgrade your system to Windows 11 using Windows 11 Media Creation Tool.
Important steps before proceeding
- After installing Windows 11 using the Media Creation tool, all of your user data might get cleared. So, make sure to take the backup of your data, so you won’t face any problem if your user data gets cleared.
- A good network connection is always recommended. It’s must require to install Windows 11 and to create a bootable USB Drive.
- If you’re creating the bootable USB instead of installing Windows 11, a USB Drive with a minimum of 8GB of RAM is always suggested.
Download Windows 11 Media Creation Tool
First of all, make sure you have registered in the Windows Insider program. To download the official file, you will need a Windows Insider account, So make it first. Now go to this official page and download the Windows 11 installation media. Click on Windows 11 icon and then click on the download tool now. Your Windows 11 Installation media will be now downloaded successfully in minutes (depending upon your network speeds).
After installing the file, run it on your PC system. After this, you’ll get a prompt saying “Getting a few things ready!”. Now, you’ll see two options: “Upgrade the PC Now” and “Create Installation Media (USB flash drive, DVD, or ISO file) for another PC”.
You can choose the option accordingly, if you choose “Upgrade the PC Now”, then your system will be upgraded to Windows 11. While, on the other hand, if you choose “Create installation media” then it will create a bootable file instead of upgrading your system.
Upgrade the PC Now
If you choose the “Upgrade the PC Now” option, then the Media Creation tool will start downloading the Windows 11 File and upon downloading successfully, you will be able to install it in your system. After successful installation, complete the setup and you will be now able to run Windows 11 in your system seamlessly.
Create Installation Media
If you choose the option “Create installation media.” then you will now get a prompt asking for language, edition, and architecture details of your system. Make sure to enter the details correctly and also you can choose the option “Use the recommended option for the PC!”. It will automatically select the option compatible with your system.
Now click on Next and you’ll get two options namely “Create USB flash drive” and “ISO file”. In create a USB flash drive option, it will create a bootable USB drive for you. And if you choose the second option, you will be able to burn the ISO file later to create a bootable USB drive or a DVD.
- If you select the “Create USB Flash drive” option, then make sure to connect the USB. The tool will automatically download and burn into the US connection. And you can flash it later.
- For the “ISO File” option, it will download the ISO file of Windows 11 and you’ll later have to burn it using any third-party apps to make it bootable.
We recommend you to use the “Create USB Flash Drive” option here, as it is easier to use.
Ready to Install
After creating the bootable Windows 11, plug the USB Drive in which you’ve installed the bootable file. Boot the PC into BIOS and install the system. You can now use Windows 11 seamlessly if you have followed all the steps mentioned above correctly. You can read our “types of Windows 11 product key”, “Password Reset”, and TPM 2.0 Bypass” article here.
Conclusion
If you were looking for alternatives to replace Windows 10 Media Creation Tool on Mac, UUByte is the greatest application among all, as it gives you the authority to edit and extract the ISO files, but these features are not available in Etcher. Through Etcher, you can only create a bootable USB. As stated earlier, to access Boot Camp Assistant, you must have sound knowledge of disk partition. Hence, UUByte is a good choice and even a beginner can use this software as an alternative to Windows 10 Media Creation Tool.
By Petty Madison | Post to ISO Topic
Petty is editor in chief at UUByte and writes various topics about Windows and Mac to help people make the most of current technology.
How to use Media Creation Tool
Let’s go through the process of upgrading from Windows 10 Version 1903 to Version 1909 using Windows 10 Media Creation Tool 1909.
For specific version tool, you can use the following direct download links:
Advertisement
2- Running the setup
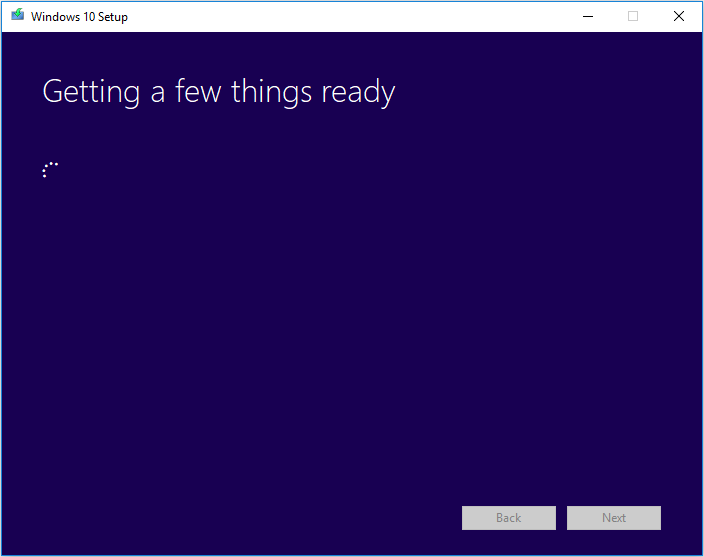
Once downloaded, run the file MediaCreationTool20h2.exe. This will open a new window which will take some time “Getting a few things ready”.
Getting a few things ready
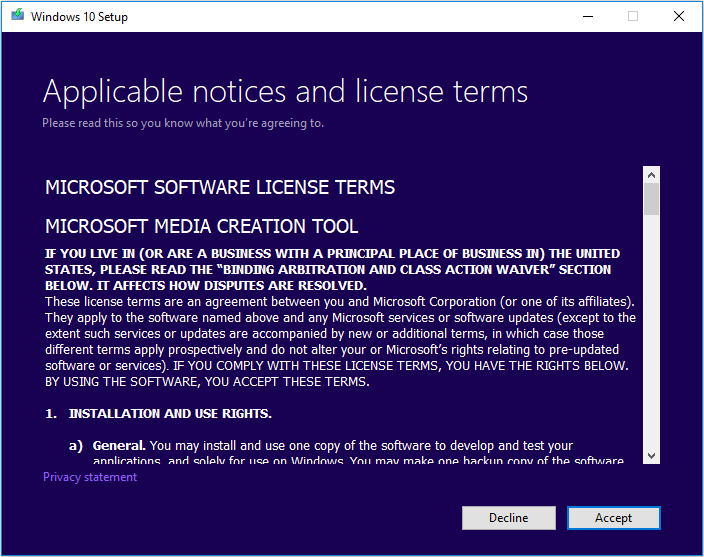
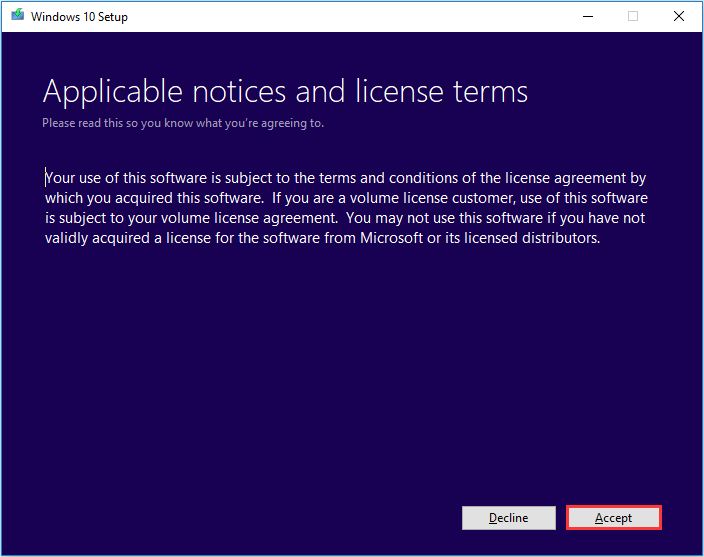
You will need to accept the license terms from Microsoft.Windows 10 Setup terms of use
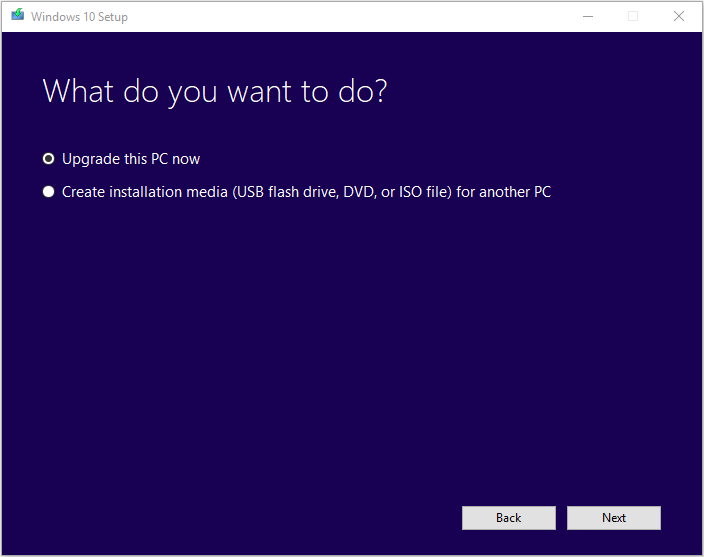
3- Choose your option
After accepting the license terms, you will be presented with two options:
- Upgrade this PC now
- Create installation media (USB flash drive, DVD, or ISO file) for another PC
Windows 10 Media Creation Tool options
The upgrade option is checked by default. If you want to upgrade your Windows 10 to the latest version, then you should select this option.
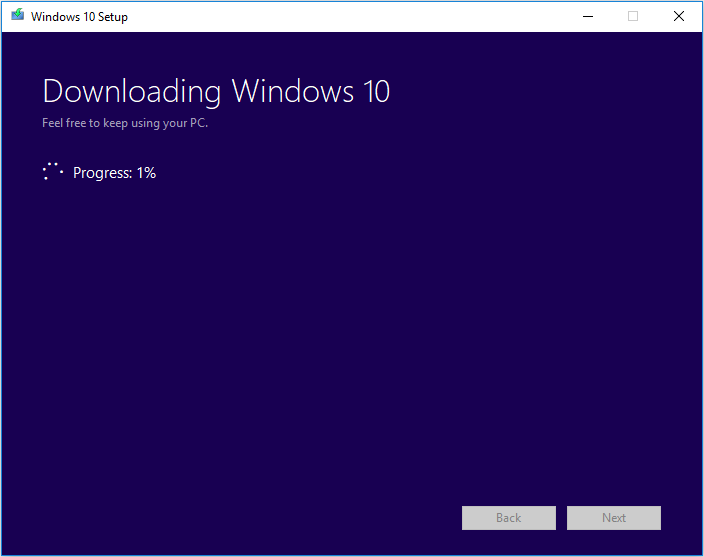
Once you press the Next button while selecting the first option, you will be taken to a new screen which will show you the progress of Windows 10 download from Microsoft servers.Downloading Windows 10
4- Upgrading PC
Once the download is complete, the setup will ask you whether you want to download the latest security updates and install them along with the feature update. You can download the updates now or leave it for later as Windows will automatically download them after installation.
When asked, please select Keep personal files and apps. This makes sure that your files and applications remain safe.
5- Install Windows 10 Version 20H2
Once you hit the Next button, Windows 10 Version 20H2 will start installing. once the installation is complete, you will be required to restart the system. If everything goes well, you can login to the updated version of Windows 10. Otherwise, if the setup fails for any reason, you will revert to the version of Windows which was installed before upgrading.
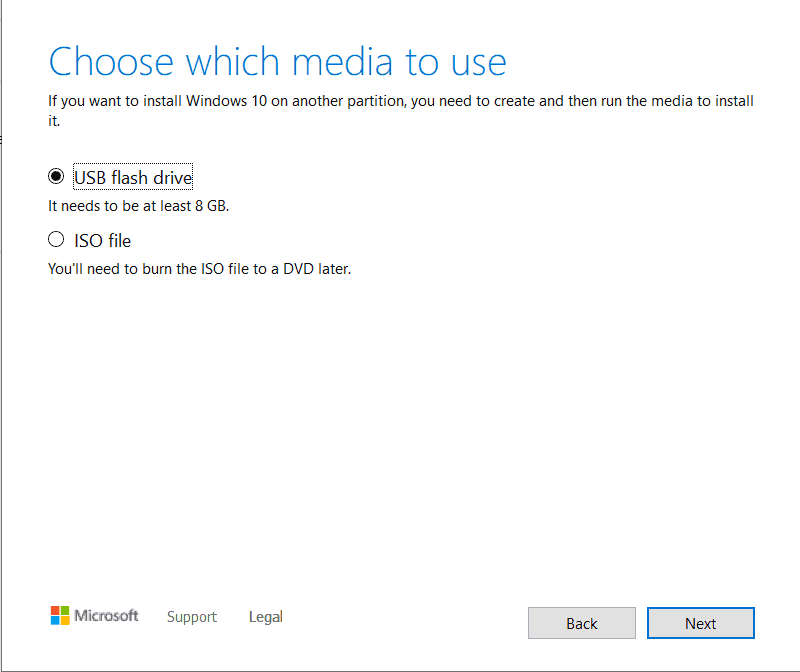
6- Create installation media
In step no. 3, if you selected the second option then you will be greeted with a similar screen but you will need to select Windows 10 language, edition, and architecture.Select language edition and architecture
Next, you will have two options:
- USB flash drive
- ISO file
Choose which media to use
If you want to directly create a bootable USB drive, then select the first option. You will need USB/DVD storage of at least 8 GB.
If you want to download the ISO file, then select the second option. You can create a bootable USB drive from the ISO using Rufus.
Pressing the Next button will start the download process.
You can also download Windows 10 ISO directly.
How to download the Windows 10 Media Creation Tool
If you’re wondering what the Windows 10 Media Creation Tool is, here’s the answer: a small executable file made by Microsoft, that allows you to download Windows 10 and create your installation media both on USB devices or in an ISO file. Furthermore, the Windows 10 Media Creation Tool also lets you directly upgrade your current computer or device to the latest version of the operating system.
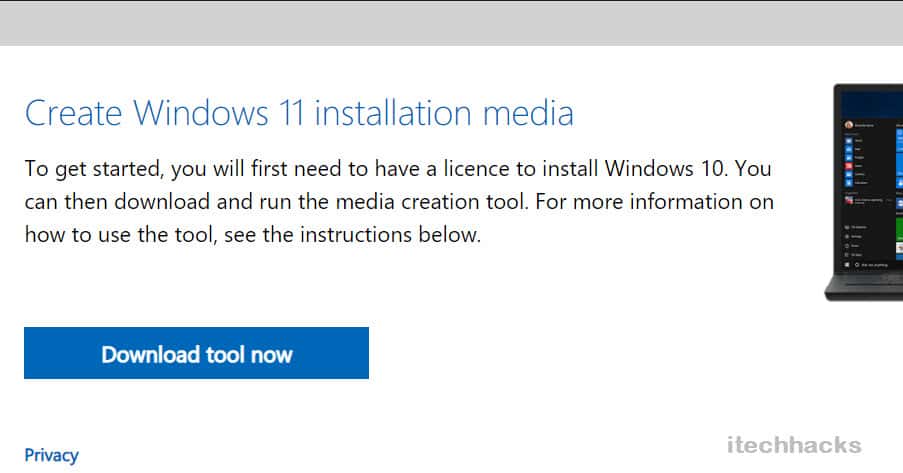
The next question you might ask is: «How do I get Windows 10 Media Creation Tool?» To download the Media Creation Tool, open your favorite web browser and go to this webpage: Download Windows 10. Scroll until you reach the «Download tool now» button found in the «Create Windows 10 installation media» section.

Download the Windows 10 Media Creation Tool
Microsoft asks you to download an executable file called MediaCreationTool21H1.exe, with a size of 18.5 MB. The file name ends with the version number of the latest Windows 10 update. In our case, 21H1 is the version number for Windows 10 with May 2021 Update. Save the executable file for the Windows 10 Media Creation Tool somewhere on your PC and then run it with a double-click or double-tap.

Double-click on MediaCreationTool21H1.exe
When you see the UAC prompt on your screen, choose Yes to allow the MediaCreationTool21H1.exe to run.

UAC asks your approval to run the Media Creation Tool
Depending on what you want to do, read the next section of this tutorial or the one after it.
TIP: The future versions of the MediaCreationTool21H1.exe file and of Windows 10 will have a different version number at the end. To learn more about Windows 10 versions, read: How to check the Windows 10 version, OS build, edition, or type.
Способы обновления Windows 10
Обновление системы выполняется с помощью нескольких способов:
- Автоматически через Центр обновлений Windows.
- С помощью специальной программы — Помощника по обновлению Windows 10.
- При помощи средства Media Creation Tool.
- Можно выполнить переустановку Виндовс 10 поверх ранее установленной системы.
Несколько разнообразных способов для получения и установки самой последней версии Windows 10 будут полезны в некоторых случаях.
После выхода финального релиза, обновления постепенно начинают отправляться на компьютеры пользователей по всему миру. Естественно, что новая версия операционной системы не сразу дойдет до многих пользователей, а через некоторый период времени. В этом случае, нетерпеливые пользователи могут использовать другой канал для получения обновленной сборки системы.
Бывают случаи, когда обновление заканчивается неудачно, по каким-то внутренним причинам. После этого, Windows 10 автоматически производит откат системы до предыдущей версии ОС.
А как быть, если установить вышедшую версию Windows 10 все равно желательно? Выходом из этого положения, станет использование другого способа для получения и установки обновления системы.
В данной статье, мы рассмотрим использование программы Media Creation Tool для выполнения обновления Windows 10 до последней из вышедших версий.
Утилита Media Creation Tool разработана корпорацией . Приложение не требуется устанавливать на компьютер, оно работает на русском языке. Для запуска средства, достаточно кликнуть два раза левой кнопкой мыши по исполняемому файлу.
Сначала необходимо скачать приложение Media Creation Tool с официального сайта загрузок Microsoft. На сайте: https://www.microsoft.com/ru-ru/software-download/windows10 под вопросом «Хотите установить Windows 10 на своем компьютере?», нажмите на кнопку «Скачать средство сейчас».
Use Windows Media Creation Tool to Upgrade Your PC
Windows Media Creation Tool is also a Windows upgrade tool as it can upgrade your PC to the latest Windows 10 version. According to many Windows 10 users, using Windows Update to upgrade Windows 10 may encounter some errors like the common Windows 10 update error 0x8007007e, leading to upgrade failure.
In this case, it is highly recommended to utilize Windows 10 Media Creation Tool to upgrade Windows 10. With this Windows upgrade tool, you can quickly upgrade your computer to the latest version of Windows 10. Here are detailed steps and screenshots.
Note: If you intend to upgrade your current computer to Windows 10, make sure it meets the Windows 10 system requirements.
Step 1. Download Windows 10 Media Creation Tool from Microsoft’s official website.
Step 2. Run the Media Creation Tool. To run this tool, you need to be an administrator.
Step 3. On this page, select Accept.
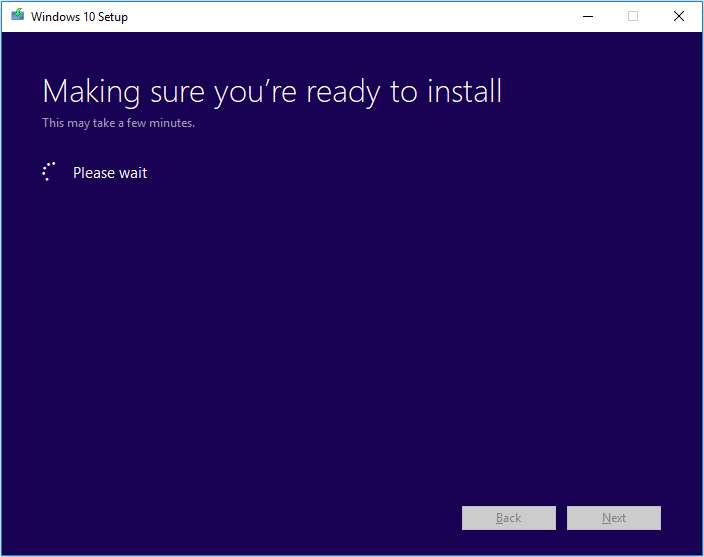
Step 4. Wait patiently for Media Creation Tool to get a few things ready. When it’s done, you can continue.
Step 5. On the What do you want to do page, select Upgrade this PC now, and then click Next.
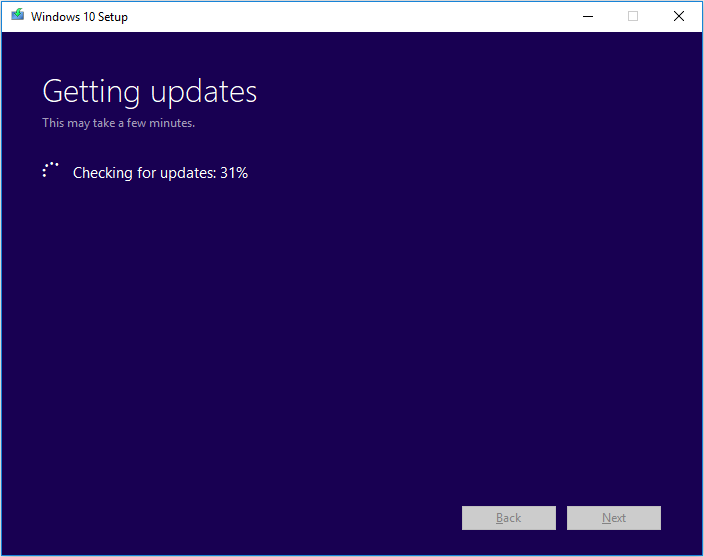
Step 6. At this time, Media Creation Tool will download some files for updates and then check your PC. This process may take some time. Just wait patiently and it won’t be too long.
Step 7. Read the license terms and click Accept.
Step 8. Wait for Media Creation Tool to check for updates.
Step 9. Windows 10 Media Creation Tool will check for your PC again and make sure you are ready to install.
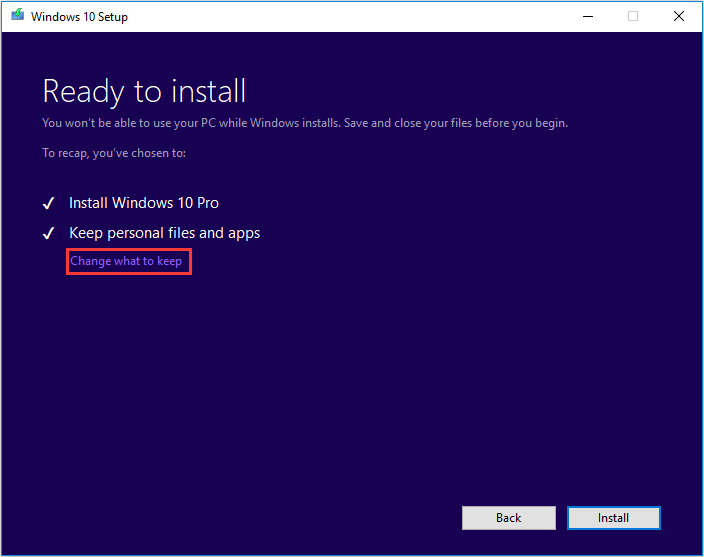
Step 10. When you get this page, you’ll see a recap of what you’ve chosen, and what will be kept through the upgrade. Choose Change what to keep, you can select what to keep by yourself.
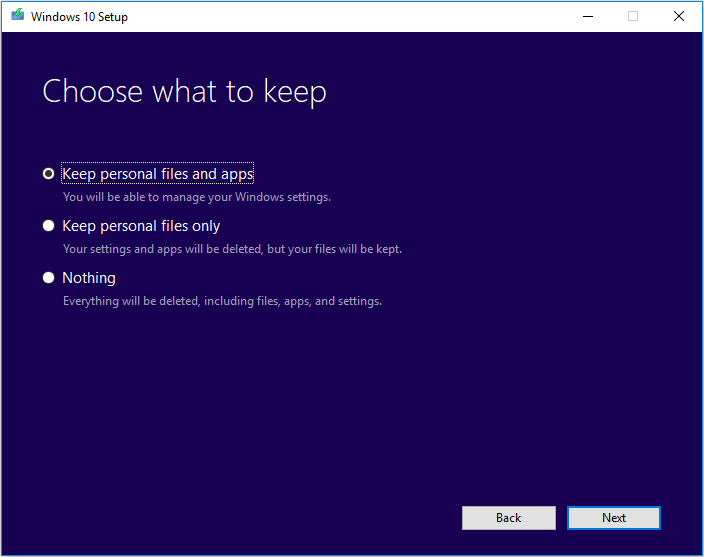
Step 11. Choose whether you would like to Keep personal files and apps, Keep personal files only, or keep Nothing during the upgrade. After selection, then click Next to continue.
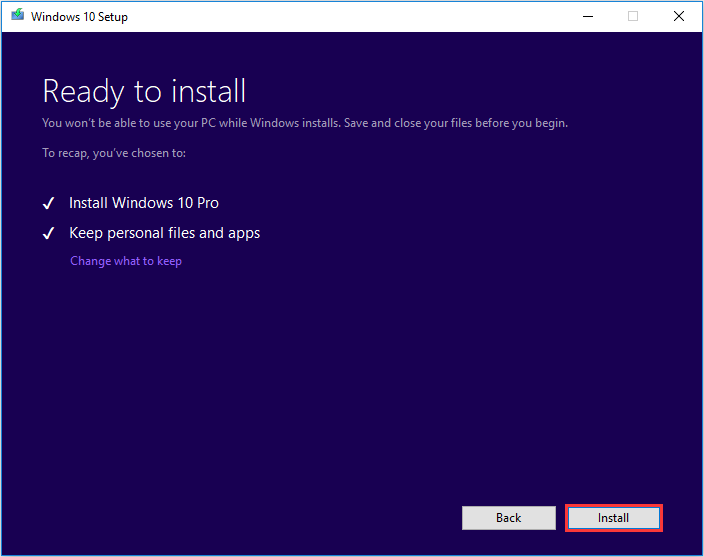
Step 12. Close any running applications and when you’re ready, select Install. During the installation, your PC will restart for a few times. Please don’t turn off your PC.
What You Will Require?
Before we continue with the guide to using Windows 11 Media Creation Tool, let’s discuss a few things that you will need throughout the process. There are certain things that you require to continue with the process of upgrading Windows with the media creation tool.
- Ensure you have a computer to install Windows.
- Take a backup of your data before you continue with the process. In case of data loss, you can easily restore the data if you have a backup of it.
- Ensure you have a stable internet connection. You will need a good speed internet connection to download Windows and then upgrade your Windows or create a bootable USB drive.
- Ensure you have a USB drive with at least 8GB of storage. You will need this if you are not upgrading your Windows but creating a bootable USB drive from the Media Creation tool.
How To Use Windows 11 Media Creation Tool
Once you have all the things you require, you can get ahead with upgrading your Windows through the Media Creation Tool. This part of the article will be discussing how you can use Windows 11 media creation tool to upgrade to Windows 11.
First, click on the link that leads you to the official Microsoft website. Choose “Windows 11“.

Now, There you will get all the information related to Windows 11. Click on “Download Now”
After you have downloaded the media creation tool for Windows 11, run it on your PC. You will be asked to accept the license terms. Once you do that, you will see a screen stating ‘Getting a few things ready.’
Next, you will see two options on the screen – ‘Upgrade this PC now,’ and ‘Create Installation Media (USB flash drive, DVD, or ISO file) for another PC.’

-
- Upgrade this PC- Choose this Option if you want to upgrade the PC on which you are running the Media Creation Tool.
- Create Installation Media for another PC- Select this option, if you want to create a bootable USB drive for another PC.
ALSO READ: How To Make Windows 11 USB Bootable
Объяснение: средство создания мультимедиа для Windows 10 (2021 г.)
В этой статье мы сделали акцент на том, как использовать Windows 10 Media Creation Tool для обновления старых ПК или перехода на совершенно новую сборку Windows 10, такую как недавно выпущенное обновление Windows 10 21H1. Так что, если вы понятия не имеете об этом изящном инструменте установки Windows, мы также добавили небольшое объяснение.
Что такое Windows 10 Media Creation Tool?
Windows 10 Media Creation Tool — это официальная утилита от Microsoft для обновления операционной системы Windows до последней сборки Windows 10. Инструмент не ограничен пользователями Windows 10, но пользователи Windows 7, 8 и 8.1 также могут использовать его для обновления до Windows 10, если у них есть подлинная лицензия. А если вы уже используете Windows 10, этот инструмент позволяет установить самую последнюю сборку.
Например, обновление Windows 10 21H1 (май 2021 г.) только что было выпущено, но вы не можете получить его в настройках Windows прямо сейчас. Изначально обновление доступно только небольшому количеству пользователей. Поэтому, если вы хотите попробовать, вам придется вручную установить обновление с помощью Windows 10 Media Creation Tool. Самое приятное то, что он не затрагивает ни один из ваших файлов и легко устанавливает последнюю сборку.
Кроме того, этот инструмент также позволяет создавать установочные носители. Вы можете создать загрузочный USB-накопитель Windows 10 прямо из приложения — без отдельной загрузки ISO-файла. В зависимости от архитектуры и выпуска Windows он автоматически определяет правильную конфигурацию и позволяет создать загрузочную флешку. Если вы хотите, вы также можете загрузить последний ISO-образ Windows 10 с помощью этого инструмента.
Как использовать Windows 10 Media Creation Tool?
Если вы ищете руководство по использованию Windows 10 Media Creation Tool, вы попали в нужное место. В этом руководстве мы сначала объяснили, как обновить текущую сборку Windows 10 с помощью этого инструмента, а затем шаги по созданию установочного носителя (или загрузочного USB-накопителя).
Обновите свой компьютер с помощью Windows 10 Media Creation Tool
1. Во-первых, нажмите на эту ссылку чтобы загрузить Windows 10 Media Creation Tool. После этого установите инструмент. Даже пользователи Windows 7, 8 и 8.1 также могут загрузить этот инструмент для обновления до Windows 10.
2. Затем запустите программу и выберите «Обновить этот компьютер сейчас», если вы хотите выполнить обновление до последней сборки Windows 10.
3. На следующей странице инструмент начнет загрузку Windows 10. Вы можете свернуть окно, так как это займет значительное время в зависимости от вашего подключения к Интернету.
4. После завершения загрузки инструмент проверит все настройки и конфигурации. Как только проверка будет завершена, вам будет предложен вариант, в котором вы можете выбрать, хотите ли вы сохранить свои файлы или установить Windows 10. Я предлагаю вам сохранить свои файлы нетронутыми. Но если вам нужна чистая установка, нажмите на опцию «Изменить то, что нужно сохранить», чтобы выбрать файлы, которые вы хотите удалить.
5. Теперь компьютер перезагрузится, и сразу же начнется установка последней сборки Windows 10. Вот и все. Инструмент создания мультимедиа очень прост в использовании.
Создание загрузочного USB-накопителя Windows 10
1. Вы также можете создать загрузочный USB-накопитель Windows 10 с помощью Windows 10 Media Creation Tool. Просто запустите инструмент и выберите «Создать установочный носитель». После этого нажмите кнопку «Далее».
2. На следующей странице будет предварительно выбрана конфигурация вашего ПК. Если вы хотите изменить его, снимите флажок «Использовать рекомендуемые параметры для этого ПК» и внесите необходимые изменения. После этого нажмите кнопку «Далее».
3. Здесь выберите опцию «Флэш-накопитель USB» и снова нажмите «Далее». Если вы хотите загрузить файл ISO, выберите второй вариант.
4. Теперь вставьте USB-накопитель (не менее 16 ГБ свободного места), и инструмент его обнаружит. Если он не отображается, извлеките флеш-накопитель и снова подключите его. Нажмите кнопку «Далее», как только увидите, что она указана в разделе «Съемные диски».
5. Наконец, он начнет загрузку последней копии Windows 10 и после этого создаст загрузочный USB-накопитель Windows 10. Тебе сейчас не нужно ничего делать.
6. По завершении процесса прошивки извлеките USB-накопитель. Теперь вы можете использовать его для установки Windows 10 на любой компьютер.
Create Installation Media For Another PC Option
If you select ‘Create installation media for another PC option’, then follow the steps given below-
When you select the option, you will be asked to select the language, edition, and architecture of the Windows you want to install. You can click ‘Use the recommended options for this PC,’ if you want the Media creation tool to automatically select the options for the machine. Once done, click on next.

-
Next, you will see two options on the window- ‘USB flash drive,’ and ‘ISO file.’
- USB flash drive- If you select this option, the Windows media creation tool will create a bootable USB drive for you.
- ISO file- If you select this option, the media creation tool will download the ISO file. You will be able to burn the ISO file later to create a bootable USB drive or a DVD.
- If you select the ‘USB flash drive’ option, ensure you connect a USB drive that is at least 8GB in storage. The media creation tool will begin downloading the Windows 11 and will burn it to the USB flash drive automatically.
- If you select the ‘ISO file’ option, the ISO file of Windows 11 will be downloaded. You can later burn it with the help of burning tools like Power ISO. You can use such tools to burn the ISO file to a USB drive.
- Once you have created the bootable USB drive of Windows 11, plug the USB drive into the computer which you want to upgrade to Windows 11.
- After plugging in the USB drive, boot into BIOS and install the Windows.
ALSO READ: How to Upgrade Windows 10 to Windows 11
Результат
Результат может быть либо положительный (новая версия успешно установлена), либо отрицательный. Сами результаты могут не устраивать пользователя, например, система обновилась, но что-то не работает или тормозит.
Разберем частые ситуации:
Не удалось завершить обновление windows 10 — отрицательный результат. Для того, чтобы понять, что помешало полноценной установке — нужно смотреть логи и выявлять причину ошибки, но исходя из практики, таких причин не так много:
- Антивирус — нередко он мешает копированию некоторых системных файлов, что приводит к ошибкам. Рекомендуется выключать или даже удалять перед установкой апдейта;
- Драйвера — установите драйвера для неизвестных устройств и обновите для известных. Часто в логах можно найти ошибки инициализации некоторых драйверов, что и вызывает ошибки;
- Системные ошибки — периодическое сканирование системы через SFC и DISM не повредит.
- Была такая ситуация — windows 10 не обновляется до 1809, устройство есть в списке поддерживаемых (ноутбук Acer, новая модель). Не работал тачпад и камера — все драйвера установлены, выполнена переустановка Windows (раза 2 или 3). В итоге помогло обновление BIOS.
- Не работает обновление windows 10 — убедитесь, что ваше устройство или оборудование совместимо с новой версией ОС. Иногда ошибки возникает на неподдерживаемых и действительно старых устройствах;
- Попробуйте выполнить Inplace Upgrade. Если не получится, вы всегда можете переустановить систему с новой версией, если это столь необходимо — если же нет, то скрыть апдейт до лучших времён.
В этой статье мы рассказали, почему не обновляется windows 10 до 1903 и как решить эту проблему. Надеемся, что эта информация была полезна и помогла решить ваш вопрос.
Что вы должны знать, прежде чем идти вперед
Прежде чем приступить к созданию собственного ISO-файла, карты памяти USB или DVD-диска с установкой Windows 10, необходимо сначала проверить следующие требования и рекомендации:
У вас должно быть работающее интернет-соединение, чтобы вы могли скачать установочные файлы.
На жестком диске или твердотельном диске должно быть достаточно свободного места для загруженных установочных файлов
Безопасной ставкой было бы иметь как минимум 12 ГБ свободного места.
Если вы собираетесь создать карту памяти USB, обратите внимание, что любые данные, хранящиеся на ней, удаляются, поскольку Media Creation Tool форматирует ее перед созданием загрузочной карты памяти с установкой Windows 10.
Если вы хотите создать носитель с установкой Windows 10, вам нужно использовать DVD или карту памяти USB объемом не менее 8 ГБ.
Если вы собираетесь обновить свой текущий компьютер или устройство, убедитесь, что оно соответствует системным требованиям. Вы можете проверить их здесь: Спецификации Windows 10.
Выводы статьи
В бесплатной программе Media Creation Tool можно выполнить обновление Windows 10 до новой версии системы. Программа выполнит все необходимые операции, в итоге, на компьютере будет установлена самая последняя версия Windows 10. При настройках по умолчанию, в обновленной версии системы будут сохранены все данные пользователя и установленные программы.
Обновление Windows 10 в Media Creation Tool (видео)
Похожие публикации:
- Сравнение версий Windows 10: таблица
- Как отключить или удалить OneDrive в Windows 10
- Диск восстановления Windows 10
- Как установить русский язык в Windows 10 — 2 способа
- Индекс производительности Windows 10 — 5 способов